Disclaimer: This article contains AI translations and should only be used as reference. Contact Cobo’s support team through help@cobo.com if you have any questions.
Business configuration
Add chains
In the production environment, the system only activates some commonly used chains by default. Before starting to use it, please first confirm in Cobo Portal whether the chains required for your business have been activated. If the chains you need have not been activated, you need to manually add them to your team configuration. The steps to add are as follows:- Log in to Cobo Portal production environment.
- Click the profile icon in the lower left corner, then click Pricing Plan.
- Navigate to Chains and click the Manage icon.
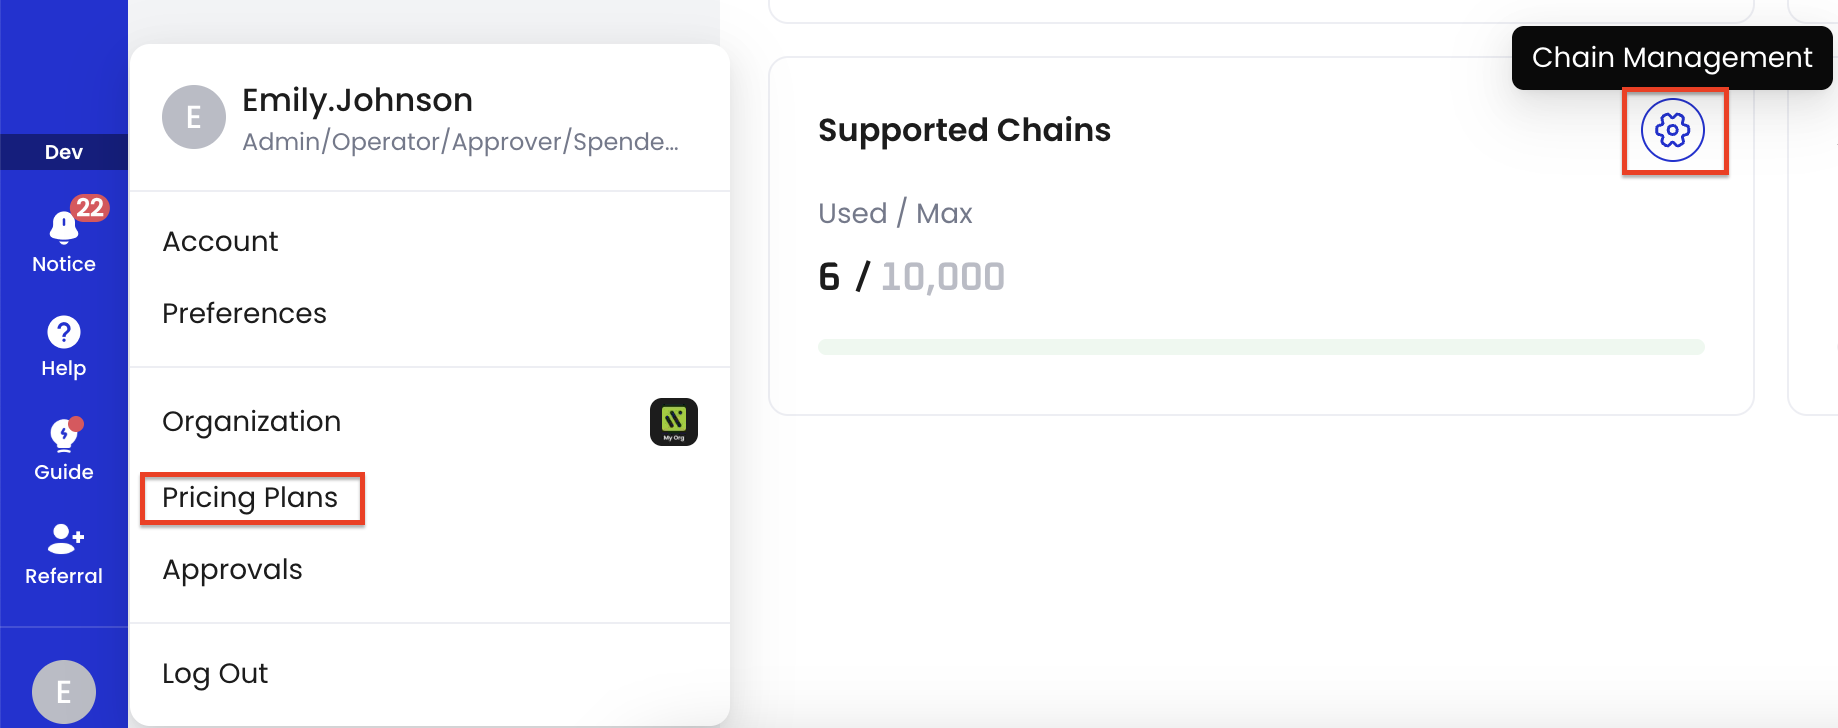
- On the Manage page, view the list of available chains. If the chain you need is not in the list, click Add Chain to add more chains for your team.
Enable Cobo KYT
Cobo KYT is a Know Your Transaction (KYT) compliance screening service provided by Cobo, used to identify and prevent suspicious or high-risk transactions.- Custodial Wallets: Cobo KYT service is enabled by default, and no additional configuration is required.
- MPC Wallets: You can:
- Contact the Cobo sales team to enable Cobo KYT service
- Or use Screening App to conduct compliance screening on funds yourself and handle transactions that do not pass.
Security configuration
Risk control configuration
Cobo Portal provides multiple risk control mechanisms designed to improve security when storing, managing, and transferring cryptocurrency.User roles and permissions
User roles consist of predefined rules that can be used to assign specific permissions to designated members within a team.- Configure at least 2 admins, which can serve for cross-validation and act as backups for each other. Other roles should be appropriately configured based on actual needs.
- It is not recommended to assign multiple roles to the same member.
Transaction policies
Transaction policies are one of the important security safeguards for your team. It is recommended that you strictly configure transaction policy rules, especially in large-amount withdrawal scenarios. Special attention should be paid to token transfer policies in off-chain transaction policies to avoid high-risk situations such as:- No risk control rules are set
- There are transactions not covered by transaction policies
- All transactions are automatically approved
- The same role can both withdraw and approve
Governance policies
Governance policies determine the approval rules on which an operation is approved or rejected. The following operations are important operations in Cobo Portal. It is recommended that you configure 2 or more admins for approval.- Invite members
- Change member user roles
- Edit governance policies
- Manage transaction policies
- Manage addresses in the Address List
- Cobo Portal Apps authorization
- Change Cobo Portal Apps permissions
- Change Cobo Portal Apps approval flows
- Manage API keys
- Edit custom user roles
Admin identity authentication
To improve security and reduce the risk of account theft, it is strongly recommended that all admins enable at least two authentication methods, with Cobo Guard being one of them. Recommended combinations include:- Cobo Guard and Google Authenticator (GA)
- Cobo Guard and security keys
It is recommended to install GA on a different device from Cobo Guard to avoid being unable to access the account due to the loss of a single device.
API key settings
When registering an API key in the production environment, you need to note:- User role: Select Payment admin or Payment member based on your business needs. You can refer to Roles and permissions to understand the permissions of different roles.
- Wallet scope: It is recommended to only select the specific wallet types you actually need to access. For example, if you only use Custodial Wallets, only select Custodial Wallets. You can adjust the wallet scope at any time according to business development needs in the future to ensure that API access permissions follow the principle of least privilege.
- You do not need to configure Callback Endpoint.
- Key type: Select Long-term (require static IP addresses) and set the IP whitelist.
Payments App settings
When installing Payments App, it is recommended that Wallet scope only select the specific wallet types you actually need to access. For example, if you only use Custodial Wallets, only select Custodial Wallets. You can adjust the wallet scope at any time according to business development needs in the future to ensure that API access permissions follow the principle of least privilege.MPC Wallets related configuration
If you are using MPC Wallets, you also need to create an MPC Vault and complete the configuration of key shares.To understand Vault, key shares, and other related concepts, see Introduction to Organization-Controlled Wallets.
1. Create Main Group
A group of key share holders is called a holder group. The Main Group is the first holder group you create before using MPC Wallets. The following diagram shows a Main Group with two key share holders. Cobo holds one key share, and your team holds the other.
- Log in to Cobo Portal production environment.
-
Click
 > MPC Wallets.
- Click Create Vault. Follow the on-screen instructions to complete Vault creation.
-
After creating the Vault, the Generate Main Group key shares dialog box will automatically pop up. In the dialog box, navigate to the Key share holder 2 section and configure the holder. For detailed information on signer types and their settings, see Signer types.
- Using Mobile Co-Signer: Select a holder from the drop-down list. The TSS Node ID field will be automatically filled. Click Confirm.
- Using Server Co-Signer: Enter the holder name, fill in the TSS Node ID, and click Confirm.
- Confirm in your Cobo Guard application that you initiated this request.
2. Generate key shares
After creating the Main Group, the next critical step is to generate key shares. This process varies depending on your signer type:-
For Mobile Co-Signer:
- Wait for the pop-up message 1 key share needs to be generated to appear on Cobo Guard (this may take a few seconds).
- Click the pop-up message to open the key generation interface.
- Follow the on-screen instructions to complete the key share generation process.
- We recommend that you back up your key shares at this time for added security. However, you can also choose to do this step after completing this guide.
-
For Server Co-Signer:
- Make sure to bring the TSS Node server online within 24 hours. When the server comes online, the key share generation process will automatically start.
- If a TSS Node callback server is configured, the generation process will only start after the callback server approves.
3. Key share backup and recovery
After generating key shares, you can back up the key share files to ensure the security and recoverability of key shares. Please keep the recovery passphrase and encrypted database password for the key share backup safe. If lost, you will need to use the Recovery Group to recover key shares (if a Recovery Group has been set up). For more details, see Mobile Co-Signer backup key shares instructions and Server Co-Signer backup key shares instructions.4. Other holder group related configurations
- Holder group configuration: In addition to the Main Group, you need to create at least one Signing Group and one Recovery Group separately. It is strongly recommended not to have the same key share holder belong to different types of holder groups at the same time, for example, belonging to both the Main Group and a Signing Group. If this situation occurs, please ensure that there is more than one Signing Group.
- Signer type: Since a large number of fund sweeping transactions may occur before settlement and the transaction times are concentrated, please ensure that you set up a Server Co-Signer in your Main Group or Signing Group to achieve automated signing.
- Risk control configuration: If you choose to use TSS Node callback as the risk control mechanism for your Server Co-Signer, you need to add your wallet’s sweep-to destination address to the whitelist of the callback server. After adding, the Server Co-Signer will automatically sign withdrawal transactions from the sweep-to destination address when performing payouts or refunds. For detailed whitelist configuration methods, refer to Risk control best practices - Auto sweeping implementation. You can view the sweep-to destination address of a wallet under the Addresses → Sweep To tab of the wallet.

Feel free to share your feedback to improve our documentation!